
Sync a Github Repository to an S3 Bucket
Create and configure an S3 bucket for static website hosting. Have Github build your static site and sync the output to the S3 bucket.
The first aspect to think about is how your static site is built and what it outputs. I’m using Eleventy which is JavaScript. My how is the build command npm run build. The what is a folder called /dist. Next, we need to consider how we can put that /dist folder into a place that is accessible to everyone. Currently it’s only on our computer, only we can see it.
In other words, we want to put our website into production. When doing so, it’s best to keep track of any changes we make. When we make changes we could say we’re creating new versions of our website. To help manage all this we’ll use software called version control.
If we want to share our code—and finished website—with other people we’ll have to store it somewhere on the Internet. This is where Github comes into play. It allows us to have a copy of our local code repository on the Internet for others to see. But still, that’s only our code. It isn’t the output of our code which is the website everyone will see. If you went to the /dist folder on Github, you’d see code. So we have to find a way for that /dist folder to be presented as our website and not the code. Version control unfortunately won’t help us with this.
We need a web server! A web server is a special piece of software that will be able to serve the /dist folder how we want. Being that our website is static, we don’t have to deploy our own web server. Instead, we can have an S3 bucket act like a web server for us. We’ll then have Github build our website code, take the output and send them over to the S3 bucket. Everytime we commit a change to our repository, this process takes place.
Static vs. Dynamic websites
“On a static website, individual webpages include static content. They might also contain client-side scripts. By contrast, a dynamic website relies on server-side processing, including server-side scripts, such as PHP, JSP, or ASP.NET.”
AWS S3 Documentation
Here’s a diagram of what we’re trying to achieve:
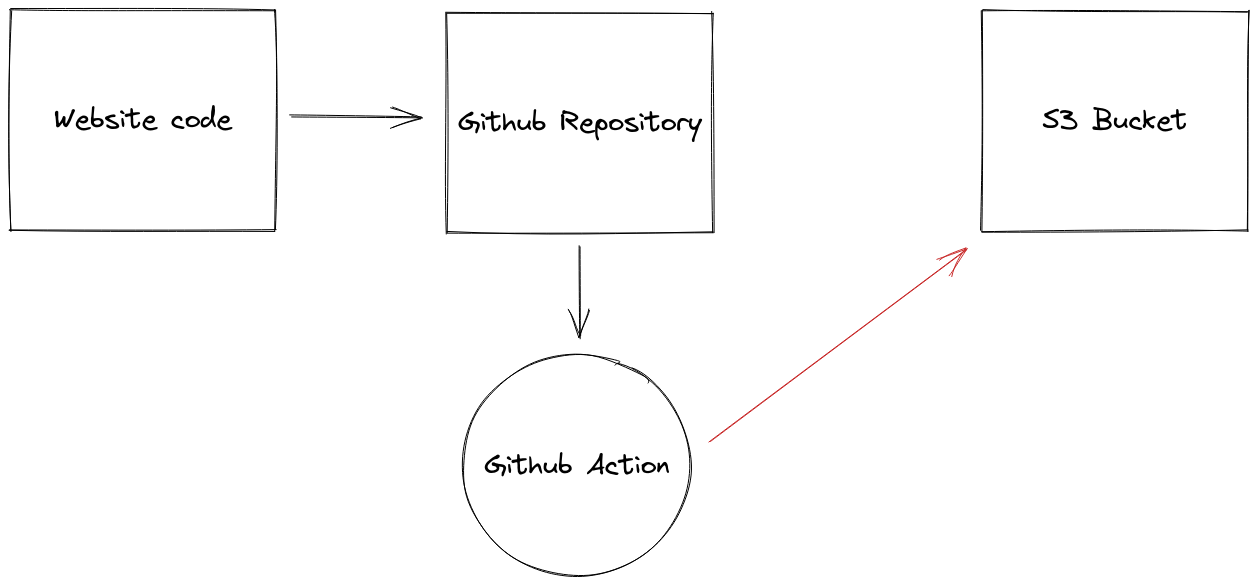
We have our website code which we send to our Github repository that triggers a script or Action to build our website code and sync the output /dist folder contents to our S3 bucket set up to act as a simple web server. Most of the action happens in the Github Action. Everything else is pretty standard. Let’s talk first about the S3 bucket because we want that setup before we start dumping our /dist folder into it. Then we’ll come back to the Action and examine it closer.
S3 bucket
Our focus in this post is on getting our /dist folder into the S3 bucket and less on the S3 bucket. In a future post, we will discuss a more comprehensive and proper approach to setting up an S3 bucket. But I will go through the basics.
Assuming you’re logged into your AWS account, head over to S3 and create a bucket. For our purposes, we’re not worried about the name. Call it whatever you’d like. If you’re setting up an actual website you wish to connect to a domain. You need to make it the domain. So for https://allowed.cloud my bucket name is allowed.cloud. With your bucket created, now you’ll need to adjust the permissions for it.
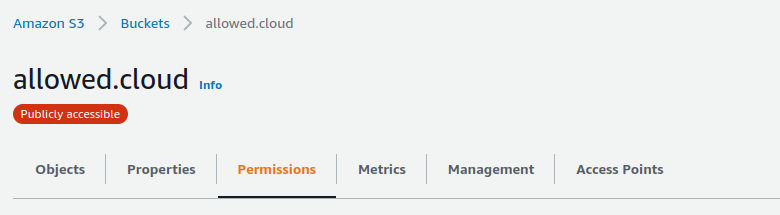
Buckets by default are private. No one else in the entire world but you can see inside. That won’t work for a website we want everyone to see. So we need to make our bucket public. This means everyone in the world will be able to see what is inside. It should go without saying that when making a bucket public we must be extra careful not to put anything inside of the bucket we don’t want public. Once public, the UI does an ample job warning you that your bucket is public. It’s hard to miss.
With the new bucket selected, head over to the Permissions tab.
We need to unblock public access, so click Block public access (bucket settings) and uncheck everything:

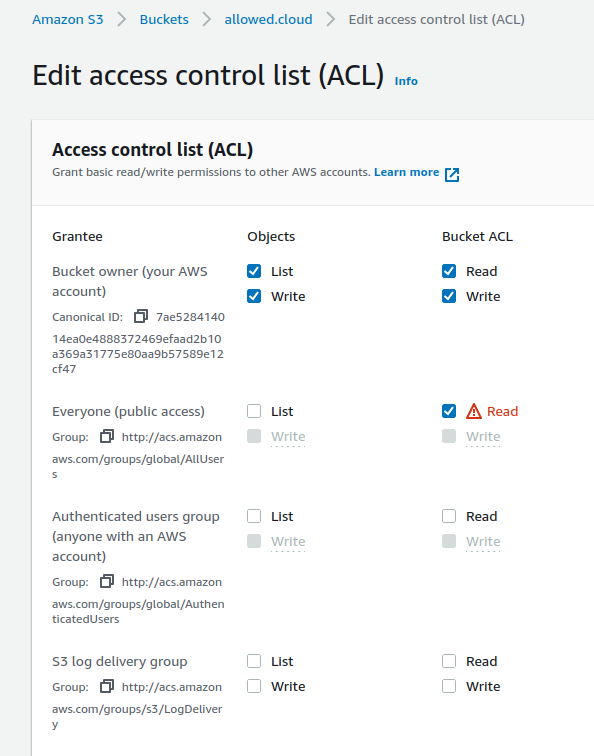
Next, scroll down in the Permission tab to Access Control list (ACL) settings:
Lastly, go over to the Properties tab and scroll all the way to the bottom. Edit the static website hosting settings:
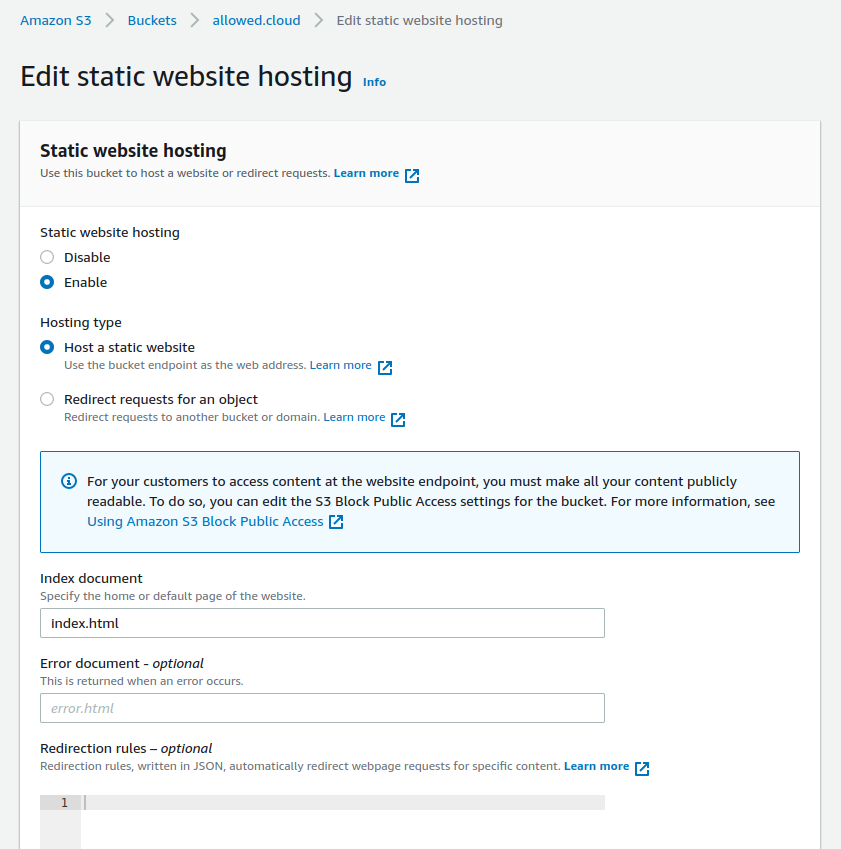
After saving your changes you’ll be given a URL called the Bucket website endpoint. Since our bucket is empty, our website won’t show up when we visit the link. So it’s now time to talk about getting the contents of our /dist folder dumped into our S3 bucket.
We’ve already given permission to one group—the entire world—to read our bucket. But there is someone else who needs permission, a different kind. We need to allow our script on Github to write to the bucket.
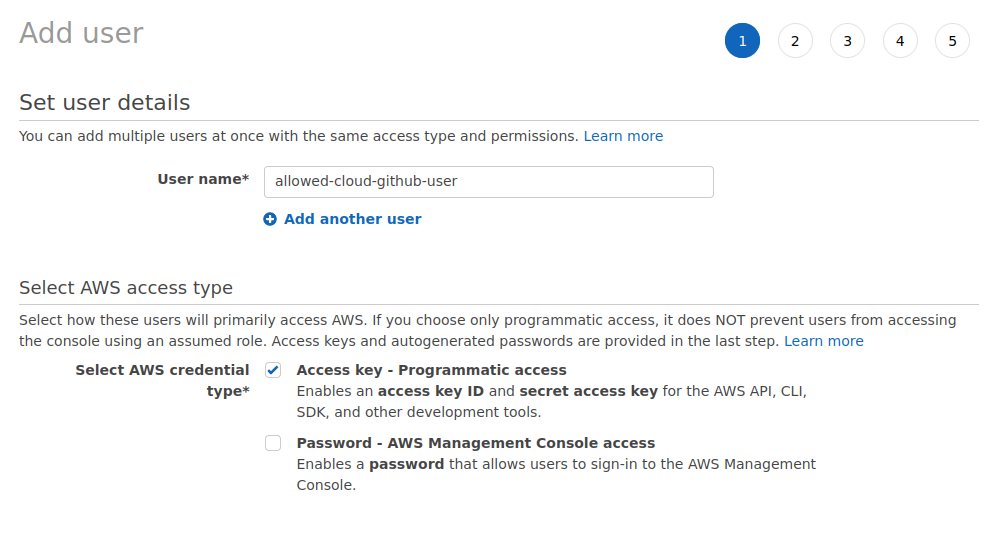
We can’t just give the password of our AWS account to this Github script. Nor would we want to! But what we can do is create a new user within our AWS account that has access to only the bucket with our website. For this, we will use the Identity and Access Management (IAM) service.
Before we create the user, we need to create a policy for this user that grants them permission to write to the bucket. So within the IAM console, click on Policies and create new. Select the JSON tab and enter:
{
"Version": "2012-10-17",
"Statement": [
{
"Sid": "VisualEditor0",
"Effect": "Allow",
"Action": [
"s3:PutObject",
"s3:GetObject",
"s3:ListBucket",
"s3:DeleteObject",
"s3:GetBucketLocation"
],
"Resource": [
"arn:aws:s3:::allowed.cloud",
"arn:aws:s3:::allowed.cloud/*"
]
}
]
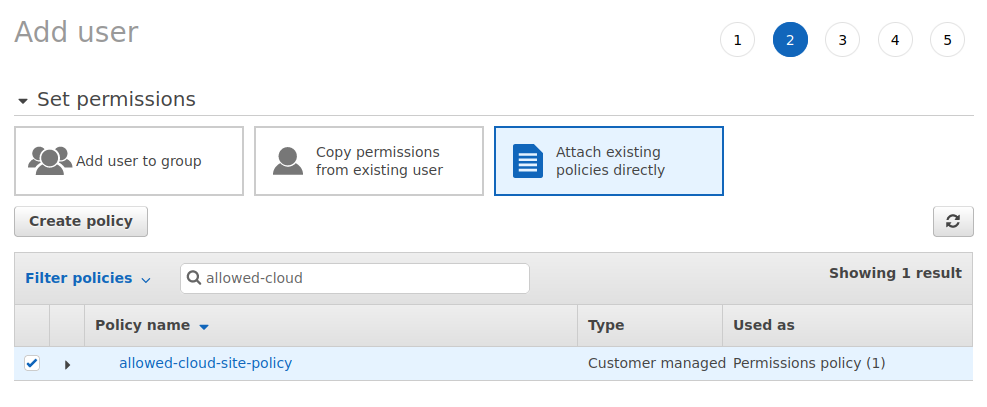
}My bucket is named allowed.cloud, so I’ve have made sure to add it under the resource section. With our policy now created, we can create the user.
Add the policy to your user:
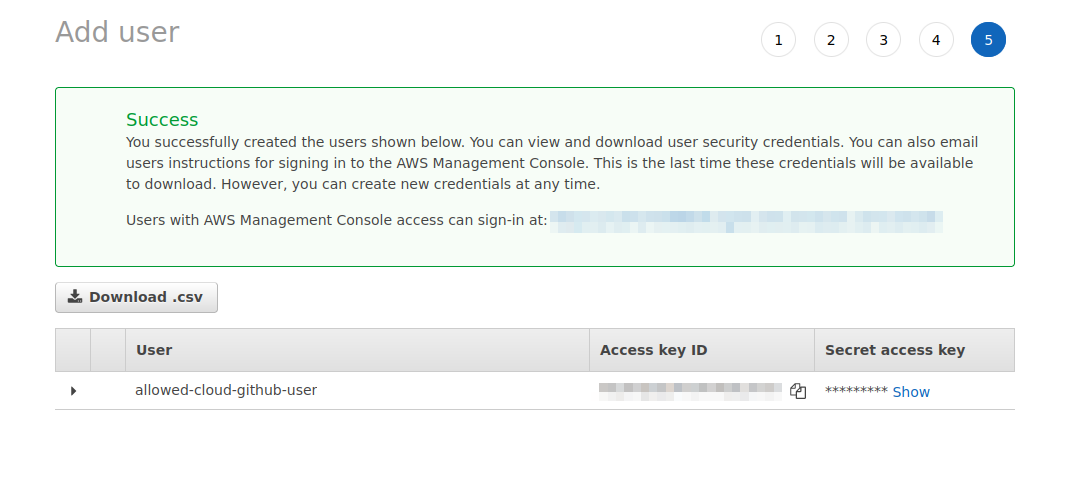
Make sure to grab your Access key ID and Secret access key at the end and put them in a safe place.
Github
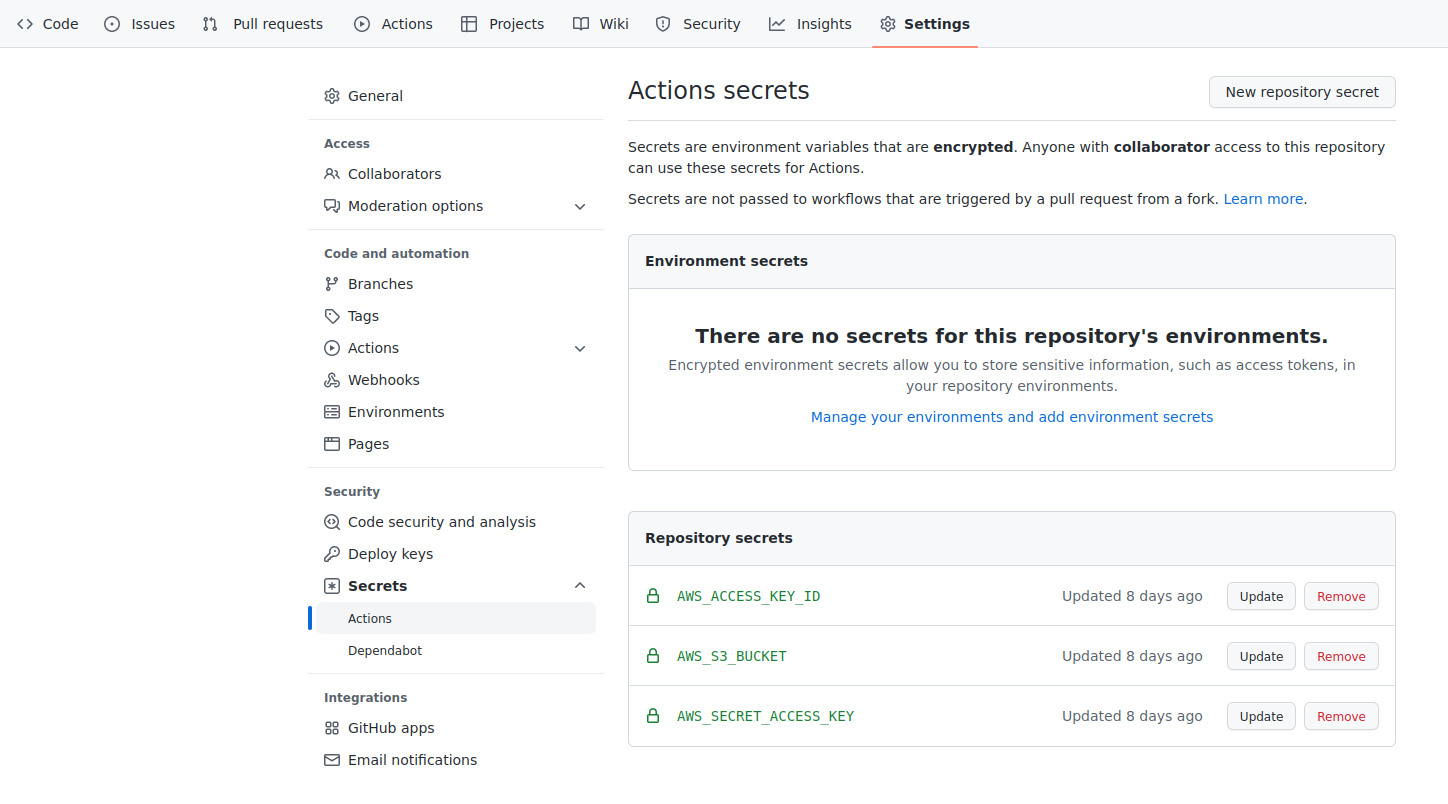
Now it’s time to hop over to our Github account and add these secrets to our repository. Going into Settings then Secrets > Actions we can add secrets that can be used in our script that will dump our build output into our bucket.
With our secrets in place, it’s time to do the last step, create the Action! For this, we will add a new file to our repository. This file lives in a folder called workflows that lives in a hidden folder called .github all within your repository. If you’re on Linux, run these commands in your repository:
mkdir -p .github/workflows
touch .github/workflows/s3-bucket-sync.yml
This will create the folders and then add a new YAML file that we’ll place the configuration for our script:
name: allowed.cloud S3 sync
on:
push:
branches:
- master
jobs:
  build_deploy:
    runs-on: ubuntu-latest
    steps:
    - uses: actions/checkout@master
    - name: Build static website
      run: |
        npm install && npm run build
    - name: Sync
      uses: jakejarvis/s3-sync-action@master
      with:
        args: --acl public-read --follow-symlinks --delete
      env:
        SOURCE_DIR: 'dist'
        AWS_S3_BUCKET: ${{ secrets.AWS_S3_BUCKET }}
        AWS_ACCESS_KEY_ID: ${{ secrets.AWS_ACCESS_KEY_ID }}
AWS_SECRET_ACCESS_KEY: ${{ secrets.AWS_SECRET_ACCESS_KEY }}To be clear, it would be wrong to say this is our script. No, this is the configuration for our script. Github will take this configuration and with it create the script that the Action will run. Within that, many little scripts will run. But in particular two since our Action consists of two parts. The first is building the website and the second is dumping the output into our S3 bucket.
jobs:
build_deploy:
runs-on: ubuntu-latest
steps:
- uses: actions/checkout@master
- name: Build static website
run: |
npm install && npm run build
- name: Sync
uses: jakejarvis/s3-sync-action@master
with:
args: --acl public-read --follow-symlinks --delete
env:
SOURCE_DIR: 'dist'
AWS_S3_BUCKET: ${{ secrets.AWS_S3_BUCKET }}
AWS_ACCESS_KEY_ID: ${{ secrets.AWS_ACCESS_KEY_ID }}
AWS_SECRET_ACCESS_KEY: ${{ secrets.AWS_SECRET_ACCESS_KEY }}We’re telling it to run the script on a computer running the latest Ubuntu operating system. Then under steps, we’re saying first it should download the latest version of our repository. Next, it should run a command which really is two commands. The first is npm install. This will download all the dependencies needed to build our website. Once that is finished, it will run our build command, npm run build. Outputted is our /dist folder which is the input to the next step.
Provided by the jakejarvis/s3-sync-action, this step will look at the input, find the /dist folder, take the contents and sync them into the S3 bucket. Sync meaning it will look at what is there already and only upload what is not there. Once it has all finished, the S3 bucket will contain the latest version of your website. Available for everyone to see at your Bucket website endpoint.
Commit and push the new YAML configuration file to your remote repository on Github. It’ll kick off the Action for the first time!
Last word
We’ve discussed a simple way you can build your static website on Github with an Action and then sync the output to an S3 bucket. Not just any bucket though, a special bucket that we have configured to act as a web server. Still, we don’t have our own domain name pointing to the website. In the next post, that is what we will go over. Doing that will not only allow us to use our own domain name. But it will also distribute our website throughout a far-reaching network. The benefit of that is people don’t have to travel all the way to Eastern Virginia to visit our website. Which will make it load faster!
It’s worth thinking about how this process can relate to other circumstances. In our case, we’re building and syncing a static website to an S3 bucket. But it doesn’t have to be only that. There might be many situations where you need to take a file in a repository and put it into an S3 bucket. At the end of the day, that’s all we’re doing. With the added build step inbetween. I always find it helpful breaking things down to simplest terms.