
Add an Alternate Domain Name to a CloudFront Distribution
CloudFront allows the use an alternate domain so you don’t have to use the assigned distribution domain name.
In the last post, we discussed how to deploy a static website living in an S3 bucket onto CloudFront. As it stands, the website is accessible from the Distribution domain name. But that is just a randomly generated alphanumeric domain name. It’s not something we would want to give out to people so they could visit our website. It’s hard to remember! So, what we can do is attach our own custom domain to the CloudFront distribution. That way, people can use our domain name instead of the distribution domain name to access the website. Since I use NameCheap and Cloudflare, this might be a bit untraditional. But, overall, the method is the same regardless of which domain registrar you use.
Domain registrar
In order for us to use a custom domain name on CloudFront, we first need a domain name. If you didn’t know, domain names are acquired from a domain registrar. AWS has its own, Route 53, I use NameCheap. Not because there is anything wrong with Route 53 but because I was using NameCheap before Route 53 was created, and I’ve never had a reason to switch. On top of that, I route all my domain names through Cloudflare for an extra layer of security. Here, Cloudflare is practically worthless since the domain is not proxied. But, it’s where I will adjust DNS settings. I mention that here because your domain registrar is typically where you will adjust your DNS settings. If I wasn’t using Cloudflare, I would adjust my DNS settings on NameCheap.
So, you’ve got your domain, from wherever. To use it with CloudFront, we need to verify with Amazon that we own the domain. For that, we can use the AWS Certificate Manager.
AWS Certificate Mananger
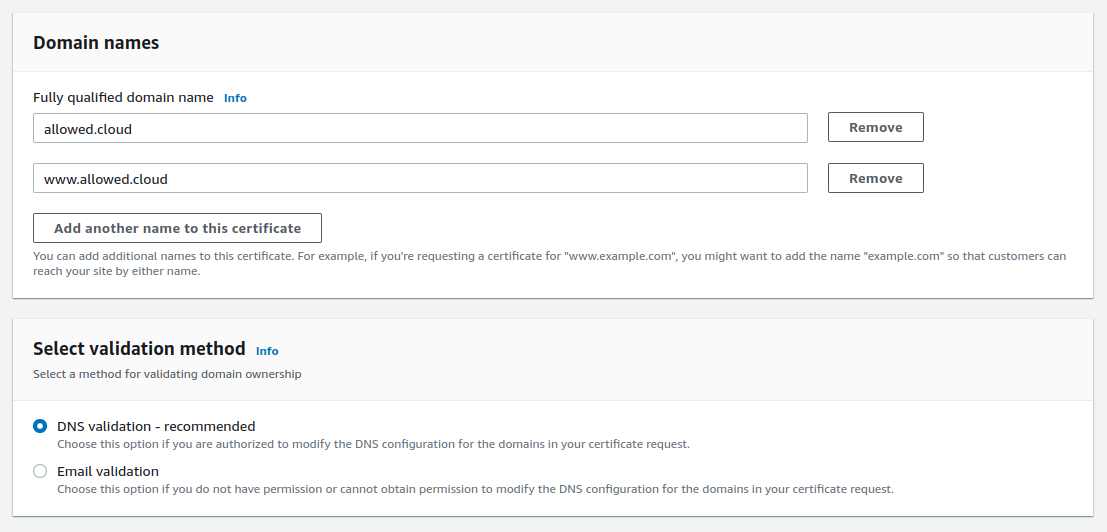
Step one is to request a public certificate with the AWS Certificate Manager service. To do this, we’ll provide our Fully qualified domain name. My domain name is allowed.cloud. We also want to have www.allowed.cloud covered, so we’ll add that too. Next, pay attention to the validation method. We’ll be using the default DNS validation method.
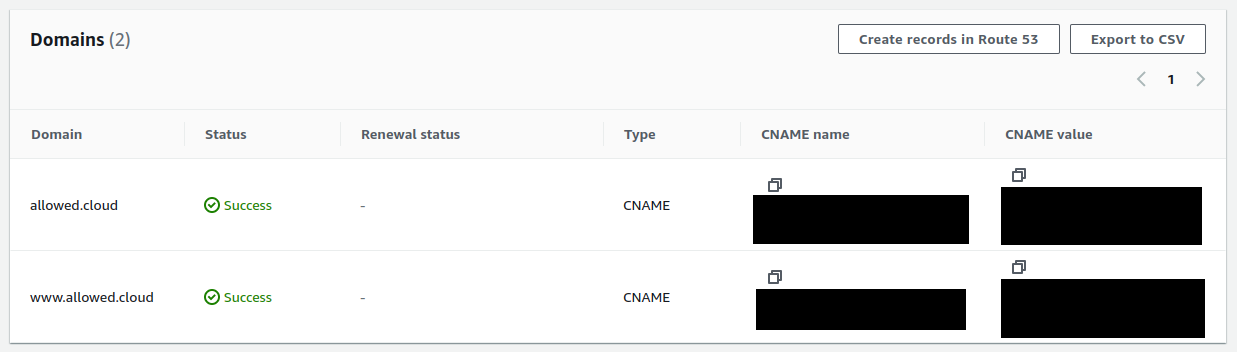
Once granted, we’ll be given a CNAME name and CNAME value for each domain. By adding those values to the DNS records of our domain, we can validate it with Amazon. In my case, I’ll go over to Cloudflare and add those to DNS records. It didn’t take any more than 30 minutes for everything to become validated once I added the new records.
CloudFront
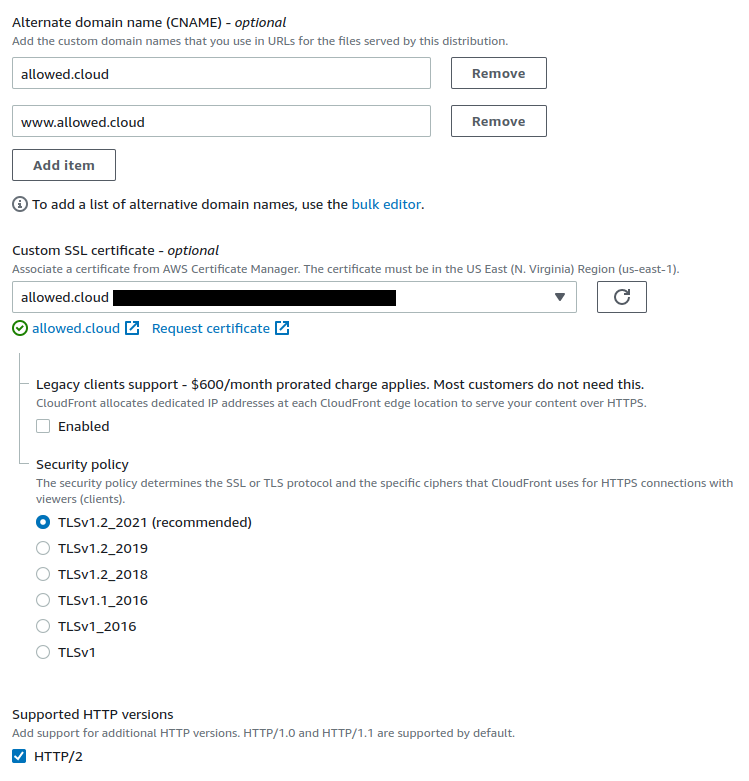
Now heading over to CloudFront, we can edit the distribution we deployed for our static site. There are two settings we need to change, the Alternate domain name and the Custom SSL certificate.
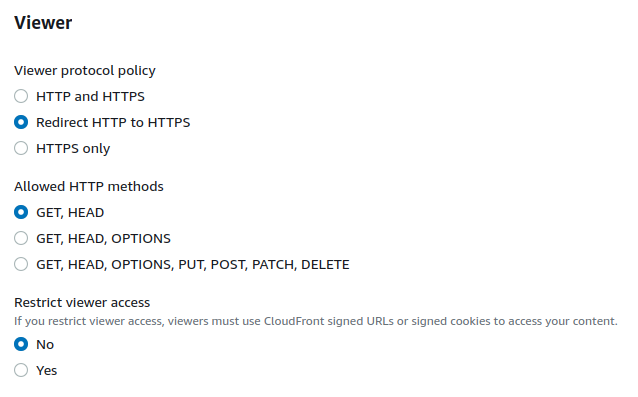
We also need to make it so that users are redirected to HTTPS. After selecting our distribution, we can go to the Behaviors section and change the Viewer protocol policy. This will allow us to make sure that HTTP requests will be redirected to HTTPS.
Final thoughts
In this post, we talked about how to assign our own domain name to a CloudFront distribution. First, we requested a public certificate using the AWS Certificate Manager service. Next, we validated our domain name by adding some new DNS records. Lastly, we used the CloudFront console to assign our domain name to the distribution. Also, we changed the behavior to forward any HTTP requests to HTTPS. So now our static website living in an S3 bucket is deployed onto CloudFront with our own domain and served securely!
The process is pretty straightforward. The longest part is waiting for your new DNS records to be picked up by the AWS Certificate Manager. For me, it didn’t take any longer than 30 minutes, that’s not bad!